How to Deploy a Node.js App to Sealos in 5 Minutes
Deploy Node.js from GitHub to Sealos in minutes. Follow this Sealos Skills guide for server entrypoints, npm start, ports, health checks, and live verification.
Want to deploy a Node.js service without writing Kubernetes YAML or building a custom release pipeline by hand? This Node.js deployment guide shows how to take a GitHub repo, run the Sealos AI deployment skill, and publish a working service on Sealos with a public HTTPS URL.
With the Sealos skill, your AI agent can inspect the project, detect that it is a Node.js service, prepare missing deployment artifacts, build or reuse a container image, generate a Sealos template, and deploy the service to Sealos Cloud.
By the end, you will have:
- A Node.js service running on Sealos
- A public HTTPS URL
- A deployment state saved under
.sealos/ - A repeatable path for future updates and Node.js production deployment prep
- Follow-up paths for Node.js + PostgreSQL and the Node.js production deployment checklist
Prerequisites
You need:
- A GitHub repository containing a working Node.js service
- A Sealos Cloud account
- Codex, Codex App, or Claude Code with the Sealos plugin installed
- A container registry path if the service needs to be built, such as GHCR or Docker Hub
- Optional but useful: Docker, GitHub CLI,
kubectl, and Node.js available locally
One Sealos plugin installs deploy, database, S3, canvas, app-builder, and supporting cloud-native skills from root skills/**.
If you are using Codex, install the Sealos plugin with the native Codex marketplace flow:
For Codex compatibility or local testing, use:
If you are using Claude Code, install the same Sealos plugin with the native Claude Code marketplace flow:
For Claude Code compatibility, use:
After installation:
- In Codex CLI, use
$sealos - In Codex App, click + -> Plugins -> Sealos
- In Claude Code, use
/sealos
What the Sealos skill does for a Node.js service
When you ask Sealos to deploy a GitHub repo, the deploy skill runs one stateful pipeline:
- Phase 0 preflight checks the project path, useful local tools, Sealos authentication, workspace access, and any Docker or registry readiness that your chosen deploy path needs.
- Phase 1 assessment inspects the service and writes
.sealos/analysis.jsonso you can see what Sealos inferred before anything is deployed. - Phase 2 image detection looks for a reusable linux/amd64 image in registries, compose files, CI workflows, or project docs.
- Phase 3 Dockerfile generation or reuse prepares a container path only when the project needs one.
- Phase 4 build and push runs only when Sealos needs a new image. It records the result in
.sealos/build/build-result.json. - Phase 5 template generation writes
.sealos/template/index.yaml, the Sealos resource plan for the app, service, ingress, environment variables, image pull Secret references, and database resources when applicable. - Phase 5.5 configuration asks for missing required values and lets you review deployment settings.
- Phase 6 deploy submits the generated template through Sealos and checks resource readiness.
- Phase 6.5 Runtime Truth Pass verifies the live service before the deployment is accepted.
For a typical Node.js service, it detects:
- Runtime: Node.js
- Server entrypoint:
server.js,app.js,dist/server.js, or the file behindnpm start - Package manager: npm, pnpm, yarn, or bun
- Build command, usually absent for plain JavaScript or
npm run buildfor TypeScript and bundled services - Runtime command, usually
npm start - Required environment variables from
.env.example, source code, and config files - Runtime port from
PORT, a documented default, or the generated template - Health endpoint such as
/healthzor/health
Step 1: Start with a deployable GitHub repo
Your repository should include a normal Node.js service structure:
Your package.json should include a production start command:
For a TypeScript service, a build step is expected:
The exact framework can differ. Express, Fastify, Hono on Node.js, NestJS, and custom HTTP servers all work when the service starts reliably in a container.
Before deploying, verify the actual scripts in package.json:
Use npm run build before npm start when the service compiles TypeScript or bundles server code.
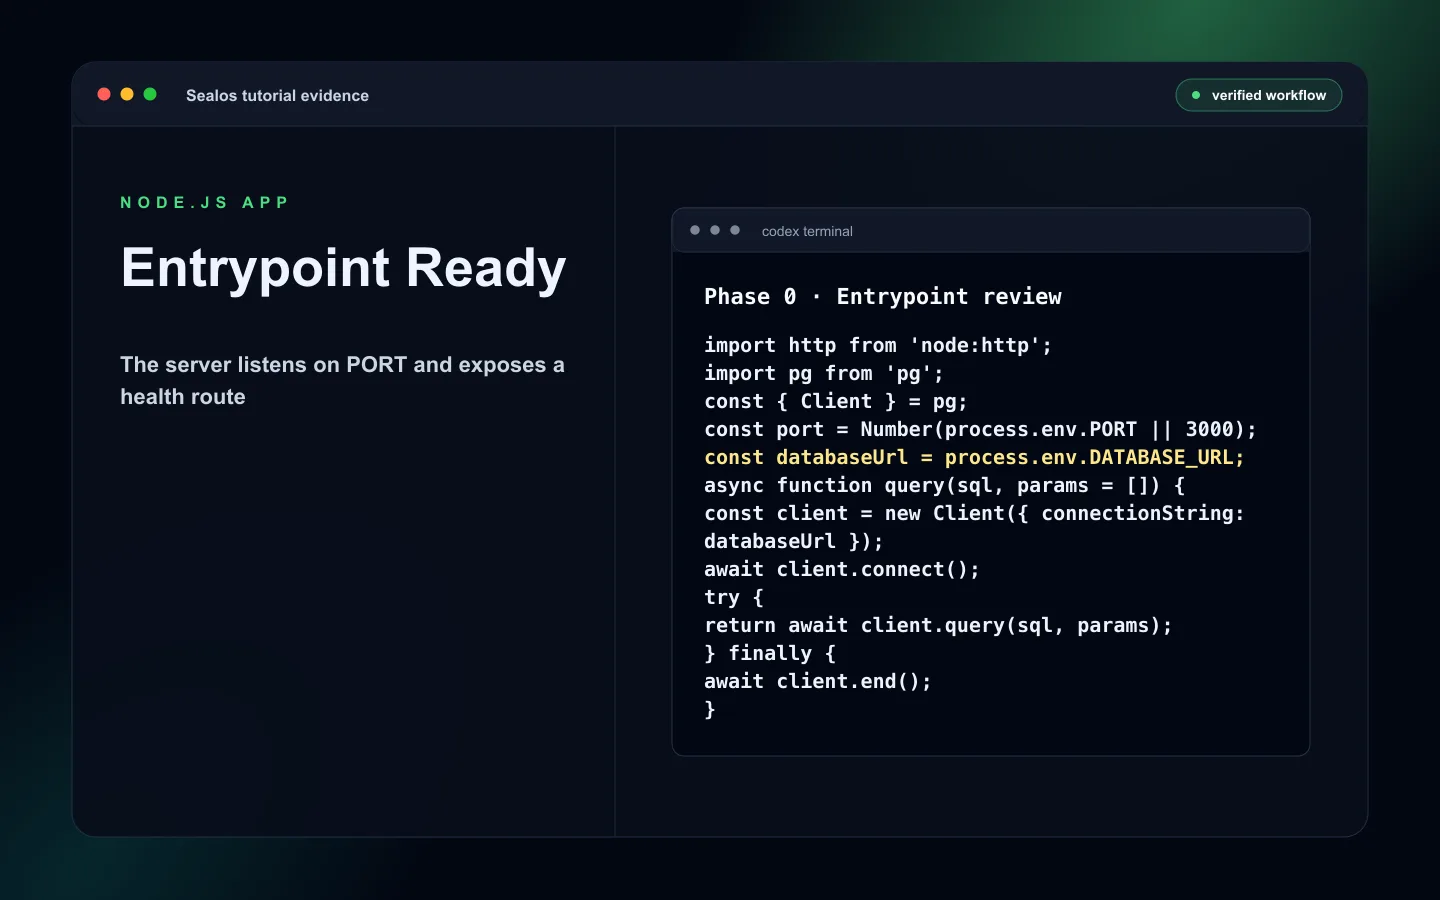 Node.js package script and entrypoint review for server.js app.js or dist/server.js
Your service should read PORT, bind to 0.0.0.0, and expose a lightweight health endpoint:
Step 2: Ask Sealos to deploy the repo
In Codex CLI, run:
In Claude Code, run:
If you are already inside the repo, you can say:
The skill starts with preflight checks. It verifies the project path, checks useful tools, and confirms Sealos authentication.
Preflight also checks the selected Sealos workspace and permissions to create resources. Docker, buildx, GHCR, and registry warnings appear when the service needs a local build or private image push. A repo that already has a usable public linux/amd64 image may skip that build path.
Step 3: Review the project assessment
The skill analyzes the repo and prints a readiness summary.
For a healthy Node.js service, you should see something like:
This is the first important checkpoint. It tells you whether Sealos understands your repo as a deployable service.
If the score is low, fix the project before continuing. Common reasons include:
- Missing
startscript npm startlaunches a local dev watcher instead of a production process- The service binds only to
localhost - The service ignores
PORT - No identifiable HTTP server or health endpoint
- Required env vars are missing from
.env.example
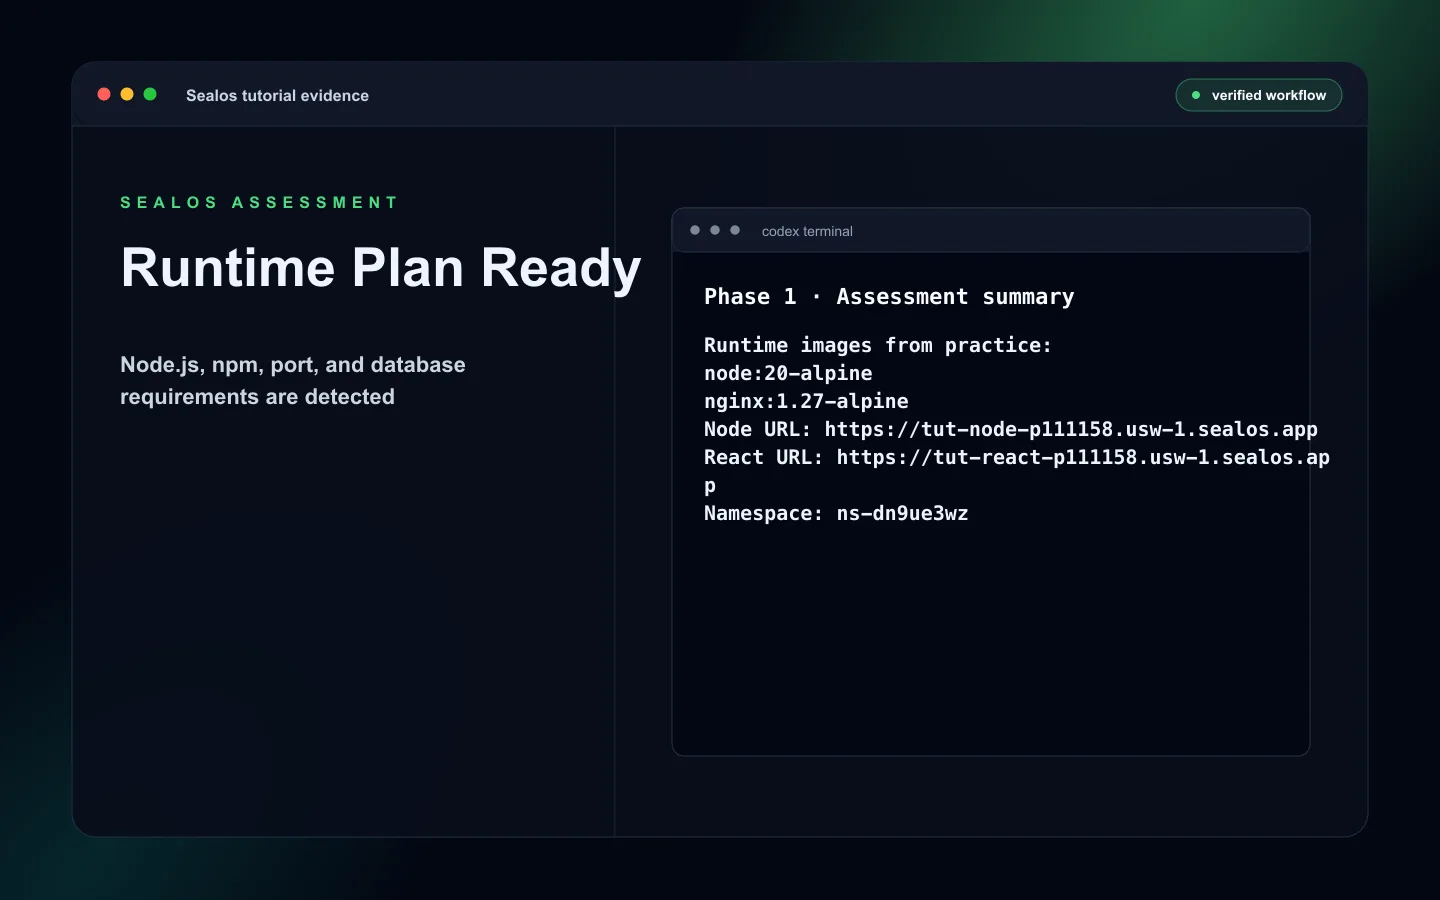 Node.js service assessment summary for Sealos deployment
Step 4: Let Sealos prepare the container
If your repo already has a valid Dockerfile, Sealos can reuse it.
If it needs to generate one, the Node.js production pattern is a dependency install step, an optional build step, and a runtime command that starts exactly one foreground service process.
A generated runtime should make the container start command explicit:
Review .sealos/template/index.yaml before deploy. The exposed container port should match the port your service reads from PORT.
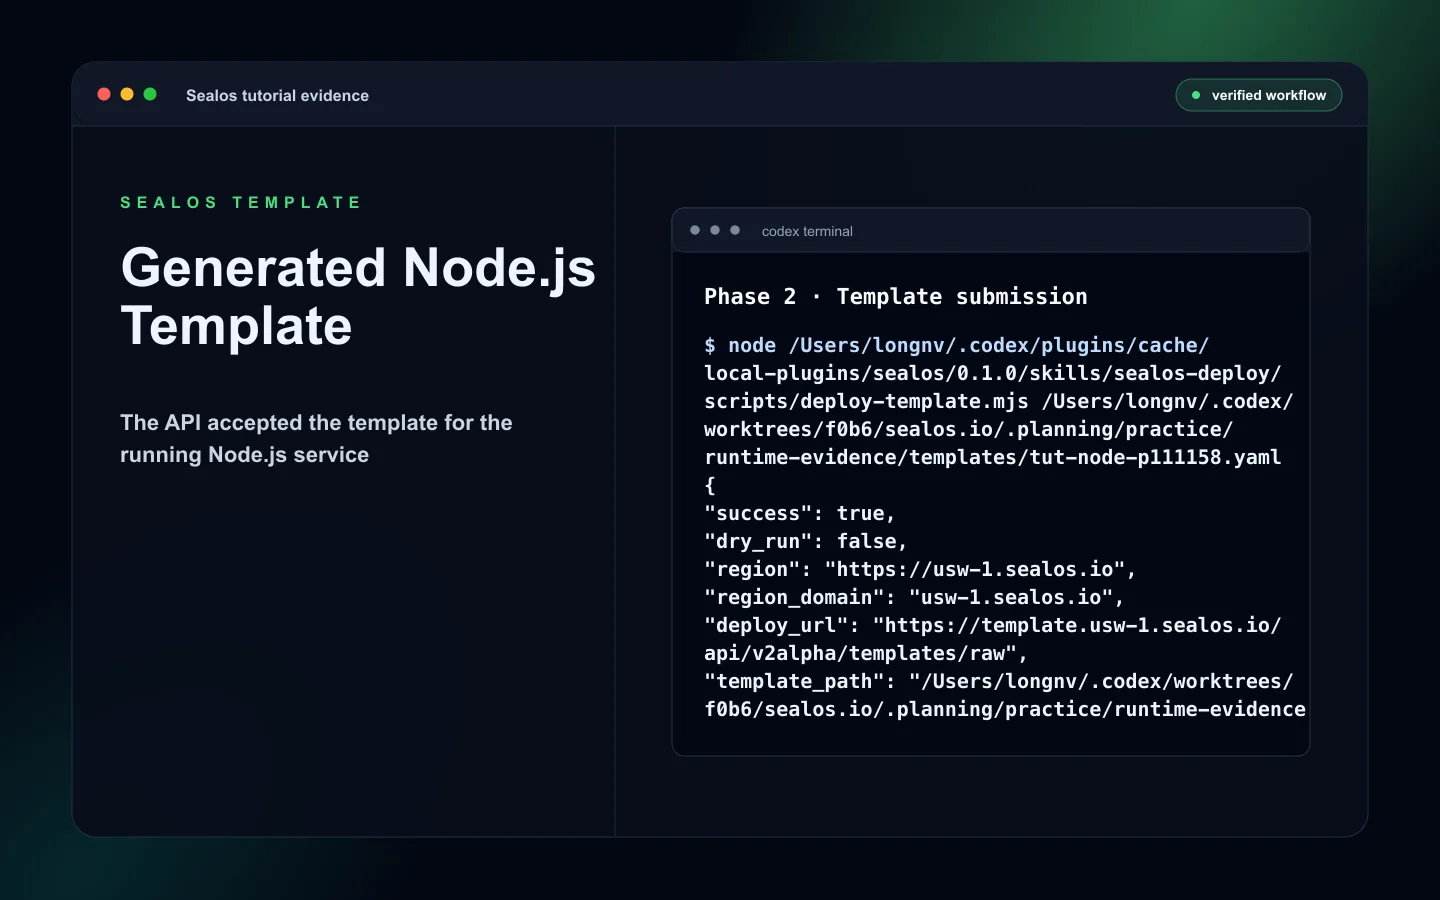 Node.js generated container start command and template port summary
Step 5: Build and push the image
When Sealos needs a new image, it builds and pushes a linux/amd64 image to the configured registry.
Check that the build uses production dependencies and the right command order:
The build result is recorded under .sealos/build/build-result.json when a local build path is used.
Step 6: Configure environment variables
Use placeholder values in .env.example and real values in Sealos configuration.
Typical Node.js service env vars include:
Keep tokens, passwords, private registry credentials, and database URLs out of committed files.
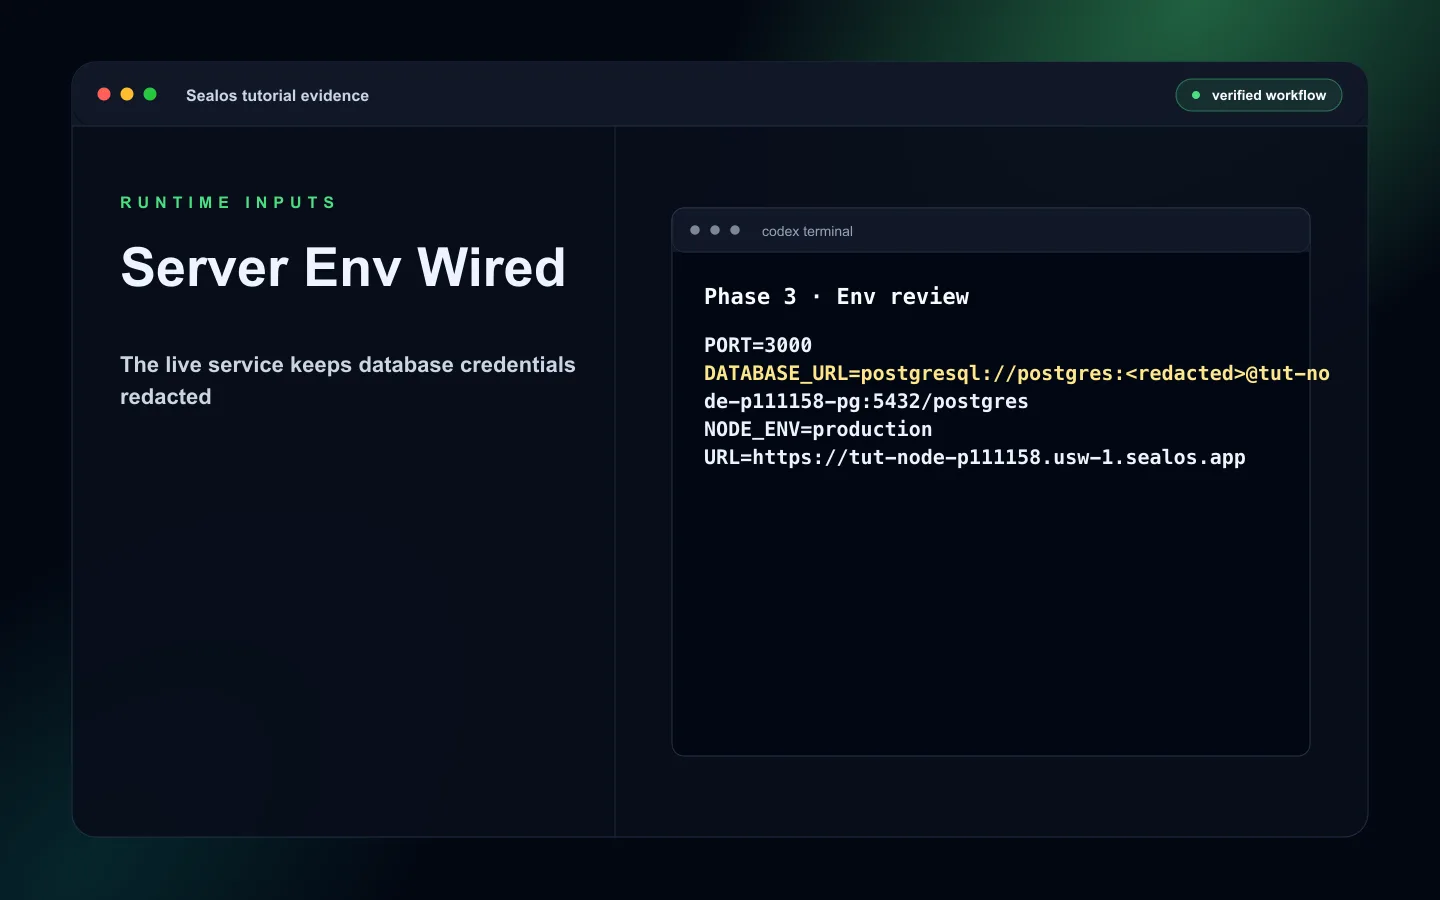 Node.js redacted environment variable configuration
Step 7: Deploy to Sealos Cloud
After configuration, Sealos applies the generated template and waits for resources to become ready.
Review:
- The generated app uses the expected image
- The Service exposes the same container port as
PORT - The Ingress gives you the expected public URL
- Env vars are present on the running app
- Rollout status reaches ready
Step 8: Verify the deployment
Run Runtime Truth Pass against the live service.
For a Node.js service, the acceptance evidence should include:
- Public URL smoke check returns a non-5xx response
/healthzor/healthreturns healthy JSON or text- Service startup logs show the expected port and no crash loop
- Request logs show the live smoke traffic
- Resource footprint is reasonable for the service size
.sealos/state.jsonrecords the accepted app name, namespace, image, App URL, and bounded history
Example smoke checks:
What changed in your repo
A successful Sealos deployment usually adds or updates:
Use these files as deployment memory. .sealos/analysis.json explains what the plugin inferred, .sealos/template/index.yaml shows the generated app/service/ingress plan, and .sealos/state.json records the last accepted runtime truth.
Common errors and fixes
| Error | Fix |
|---|---|
npm start runs a dev server | Change the script to start the production server entrypoint. |
| Service binds to localhost | Bind to 0.0.0.0 so traffic can reach the container. |
| Port mismatch | Read PORT in code and expose the same container port in .sealos/template/index.yaml. |
| Health check fails | Add /healthz or /health and verify it avoids database or external API work unless that dependency is required for readiness. |
| Logs are empty | Log startup, port, and request errors so Runtime Truth Pass can prove the live service path. |
Next steps
- Add PostgreSQL with Node.js + PostgreSQL Deployment Guide on Sealos
- Prepare launch readiness with Complete Production Deployment Checklist for Node.js on Sealos
- Open Sealos Skills when you want the repeatable plugin workflow and command entrypoints
FAQ
Keep building
Continue this Sealos path
Unify Your Entire Workflow.
Code in a ready-to-use cloud environment, deploy with a click. Sealos combines the entire dev-to-prod lifecycle into one seamless platform. No more context switching.
Explore with AI
Get AI insights on this article