What you will deploy
You will build a React Task app, use Vite to create its production files, and
deploy it with Sealos Skills. You will finish with a public HTTPS URL where
/dashboard opens directly, the JavaScript and CSS load, and a Task stays
visible after you add it and refresh the page.
| Requirement | Version used by this guide |
|---|---|
| Node.js | 24 LTS |
| npm | 11 or newer; local checks use 11.6.2 |
| Project generator | [email protected], React JavaScript template |
| React and React DOM | 19.2.8 |
| Vite and its React plugin | 8.2.2 and 6.1.1 |
| React Router | 8.3.1, Declarative Mode |
| Production server | Official nginx:1.30-alpine image |
| Dependency lock | package-lock.json |
Prerequisites:
- Node.js 24 LTS, npm, Git, and a terminal using Bash or Zsh.
- Docker with a running engine and Buildx for the local container check and image build.
- Local Codex with access to your project directory.
- A Sealos Cloud account and a target workspace. The image upload also needs registry access; Sealos Skills guides the required registry authentication, including GitHub CLI setup when you use GitHub Container Registry.
For an existing React + Vite project: Jump to Prepare React and Vite for production. Keep your package manager, dependency manifest, lock file, and application behavior. Use an existing form and read view for the Task checks, and select a client route that you can open directly.
Explore more framework guides in the tutorial catalog.
Create a React Task app
Create the project
Working directory: The parent directory that will contain your project.
Accept npm's package download prompt when it appears. The generator creates
package.json, index.html, vite.config.js, and src/; installation adds
package-lock.json. The versioned commands and lock file give later builds the
same application dependencies.
Add the routes and Task form
File: src/App.jsx
Replace the generated file with:
The form trims the title, saves the updated list, and displays the saved Tasks. The storage checks keep a read or write failure visible so you can correct the browser setting before continuing.
File: src/main.jsx
Replace the generated file with:
BrowserRouter connects the browser's URL to the routes in App.jsx, following
the React Router setup.
Visiting /dashboard selects the Task form.
Add the page and stylesheet
File: index.html
Replace the generated file with:
File: src/index.css
Replace the generated stylesheet with:
You should see a pale background, a white content panel, and a blue Add task
button. Importing this CSS through main.jsx also gives the production build a
stylesheet to verify.
Remove the starter artwork and stylesheet that the Task app has replaced:
Run the app locally
Working directory: Repository root.
Open the local address printed by Vite and select Dashboard. Enter
Ship React on Sealos in Title, select Add task, then refresh
/dashboard. Confirm that the Task remains in the list.
The app saves Tasks in localStorage, which belongs to one browser profile and
one origin: the protocol, hostname, and port. Your local address and deployed
HTTPS address therefore have separate lists. Clearing site data removes that
origin's Tasks; shared records across devices require an application API and
database.
Stop the development server with Ctrl+C.
Prepare React and Vite for production
Existing-project readers resume here. Confirm that your app builds into static
files and has a working form, read view, stylesheet, and client route. Use your
own equivalent of /dashboard and retain any existing API connections and
storage behavior.
The files below are complete for the Task app. Merge the relevant settings into
an existing repository. Its package manager and lock determine the install
command in the Docker build: use npm ci for npm, pnpm install --frozen-lockfile
for pnpm, or the repository's immutable or frozen Yarn install.
Keep the corresponding package-manager setup in your builder image. When your
Vite configuration changes build.outDir, use that output directory in the
Dockerfile's final copy and in the asset checks.
Verify the dependency lock
Working directory: Repository root.
npm ci installs the versions recorded in package-lock.json, and the generated
lint command checks the source. Both commands should finish with exit status
0. Commit package.json and package-lock.json together after preparation.
If you see
npm cireport that the lock file and package file are out of sync: Runnpm installin the repository root, review the changes topackage-lock.json, then repeatnpm ci.
Set the asset base
File: vite.config.js
Replace the generated file with:
The app will use the root of its Sealos hostname. base: '/' makes Vite generate
asset URLs such as /assets/index-<hash>.js, so they work when you open
/dashboard directly. A project served under a path such as /tasks/ needs a
matching Vite base, router basename, and server mapping; see
Vite's public base path guidance.
Check the output from the repository root:
Expected: Vite prints the files under dist/, including JavaScript and CSS
inside dist/assets/, followed by Production HTML exists. Open
dist/index.html in your editor and confirm that its script and stylesheet
URLs start with /assets/.
Define the public value used during the build
File: .env.example in the repository root.
File: .gitignore
Append these lines to the generated rules:
Working directory: Repository root.
Expected: .env is ignored. The example documents the value that App.jsx
reads, and the ignored file supplies it during local development.
Vite puts VITE_ values into the browser's JavaScript during npm run build.
Use these variables for public configuration such as a page title or API base
URL. Keep secrets in the backend that owns them. To change a public value after
deployment, rebuild the image with the new value and deploy it; the Dockerfile
below passes the title into that build.
Vite environment variables
documents this behavior.
Serve the build and client routes with Nginx
File: nginx.conf in the repository root.
Nginx serves the files Vite creates. Its
try_files fallback
returns index.html for /dashboard, allowing React Router to display the
matching page. Requests under /assets/ must resolve to a real file and return
404 when a file is missing. The HTML response asks the browser to check for a
fresh version, which supports the update you will deploy later.
File: Dockerfile in the repository root.
Node installs the locked dependencies and builds dist/. The final image uses
the official Nginx image to serve that directory
on 0.0.0.0:8080. Sealos forwards the public HTTPS route to this port.
File: .dockerignore in the repository root.
These rules keep local dependencies, local build output, and environment files
outside the image's source copy. VITE_APP_TITLE reaches Vite through the build
argument in the Dockerfile.
Build and check the Nginx configuration from the repository root:
Expected: the image build succeeds, and Nginx reports that the configuration syntax is valid and its test is successful.
Test the production container locally
Working directory: Repository root.
In a second terminal, verify the root page, the client route, and a missing asset:
Expected: both page requests print the root element, and the missing asset
returns 404.
Open http://127.0.0.1:8080/dashboard directly in your browser. Confirm React
tasks, Task list, and the blue button appear. Create Production build check, refresh the page, and confirm that the Task remains visible.
In your browser's developer tools, open Network and reload the page. Select
the /assets/index-<hash>.js and /assets/index-<hash>.css requests. Confirm
successful responses and the JavaScript and text/css content types. This checks
the compiled assets through the same server you will deploy.
Stop the container with Ctrl+C.
Save the ready repository
Working directory: Repository root.
The commit saves the application, dependency lock, and production configuration
as one revision. Expected: the commit succeeds and git status --short shows a
clean working tree.
Production Readiness Checklist
- Node, npm, and the application dependencies match the version requirements.
- The dependency lock is committed, and the locked install and lint pass.
- The production build creates
dist/index.htmland JavaScript and CSS assets. - The image builds successfully, and
nginx -tsucceeds. - The container serves
/and/dashboardon port8080; the compiled assets load, and a missing asset returns404. - Creating a Task and refreshing
/dashboardkeeps it visible in the same browser. -
.env.exampledocuments the public build value, and.envis ignored.
The Task app uses browser storage. An existing app that calls an API also needs its production API URL, the API's allowed browser origin, and its required services ready before you proceed.
Deploy with Sealos Skills
Install Sealos Skills in local Codex:
Open the repository root in local Codex. In Codex App, select + → Plugins →
Sealos; in Codex CLI, use $sealos. Send this request:
For an existing app, adapt the route, public build values, and required services to the production checks you completed above.
Review the plan before confirming it:
- The account, workspace, repository revision, and application name are correct.
- The image build uses the committed Dockerfile and lock file, with
VITE_APP_TITLEsupplied during the build. - The application uses the Nginx command and port
8080, and its public HTTPS route forwards to that port. - The selected registry, image access, resource sizes, and public exposure match your intended deployment.
Confirm the plan in local Codex and complete the authentication prompts. Keep the local deployment state saved by Sealos Skills so your next deployment can target the same application.
After deployment, use the Sealos web interface to review the application, resources, logs, public access, and assigned domain. The title is part of the built JavaScript; changing it uses a new image build.
Verify the live React application
Check the deployment state
Use the Sealos Skills result and the Sealos web interface to confirm:
- The build completes
npm ciandnpm run build, including the files indist/assets/. - Nginx starts successfully, and recent application logs show successful page and asset requests.
- The Sealos Project Canvas shows the application running with healthy public
access connected to port
8080.
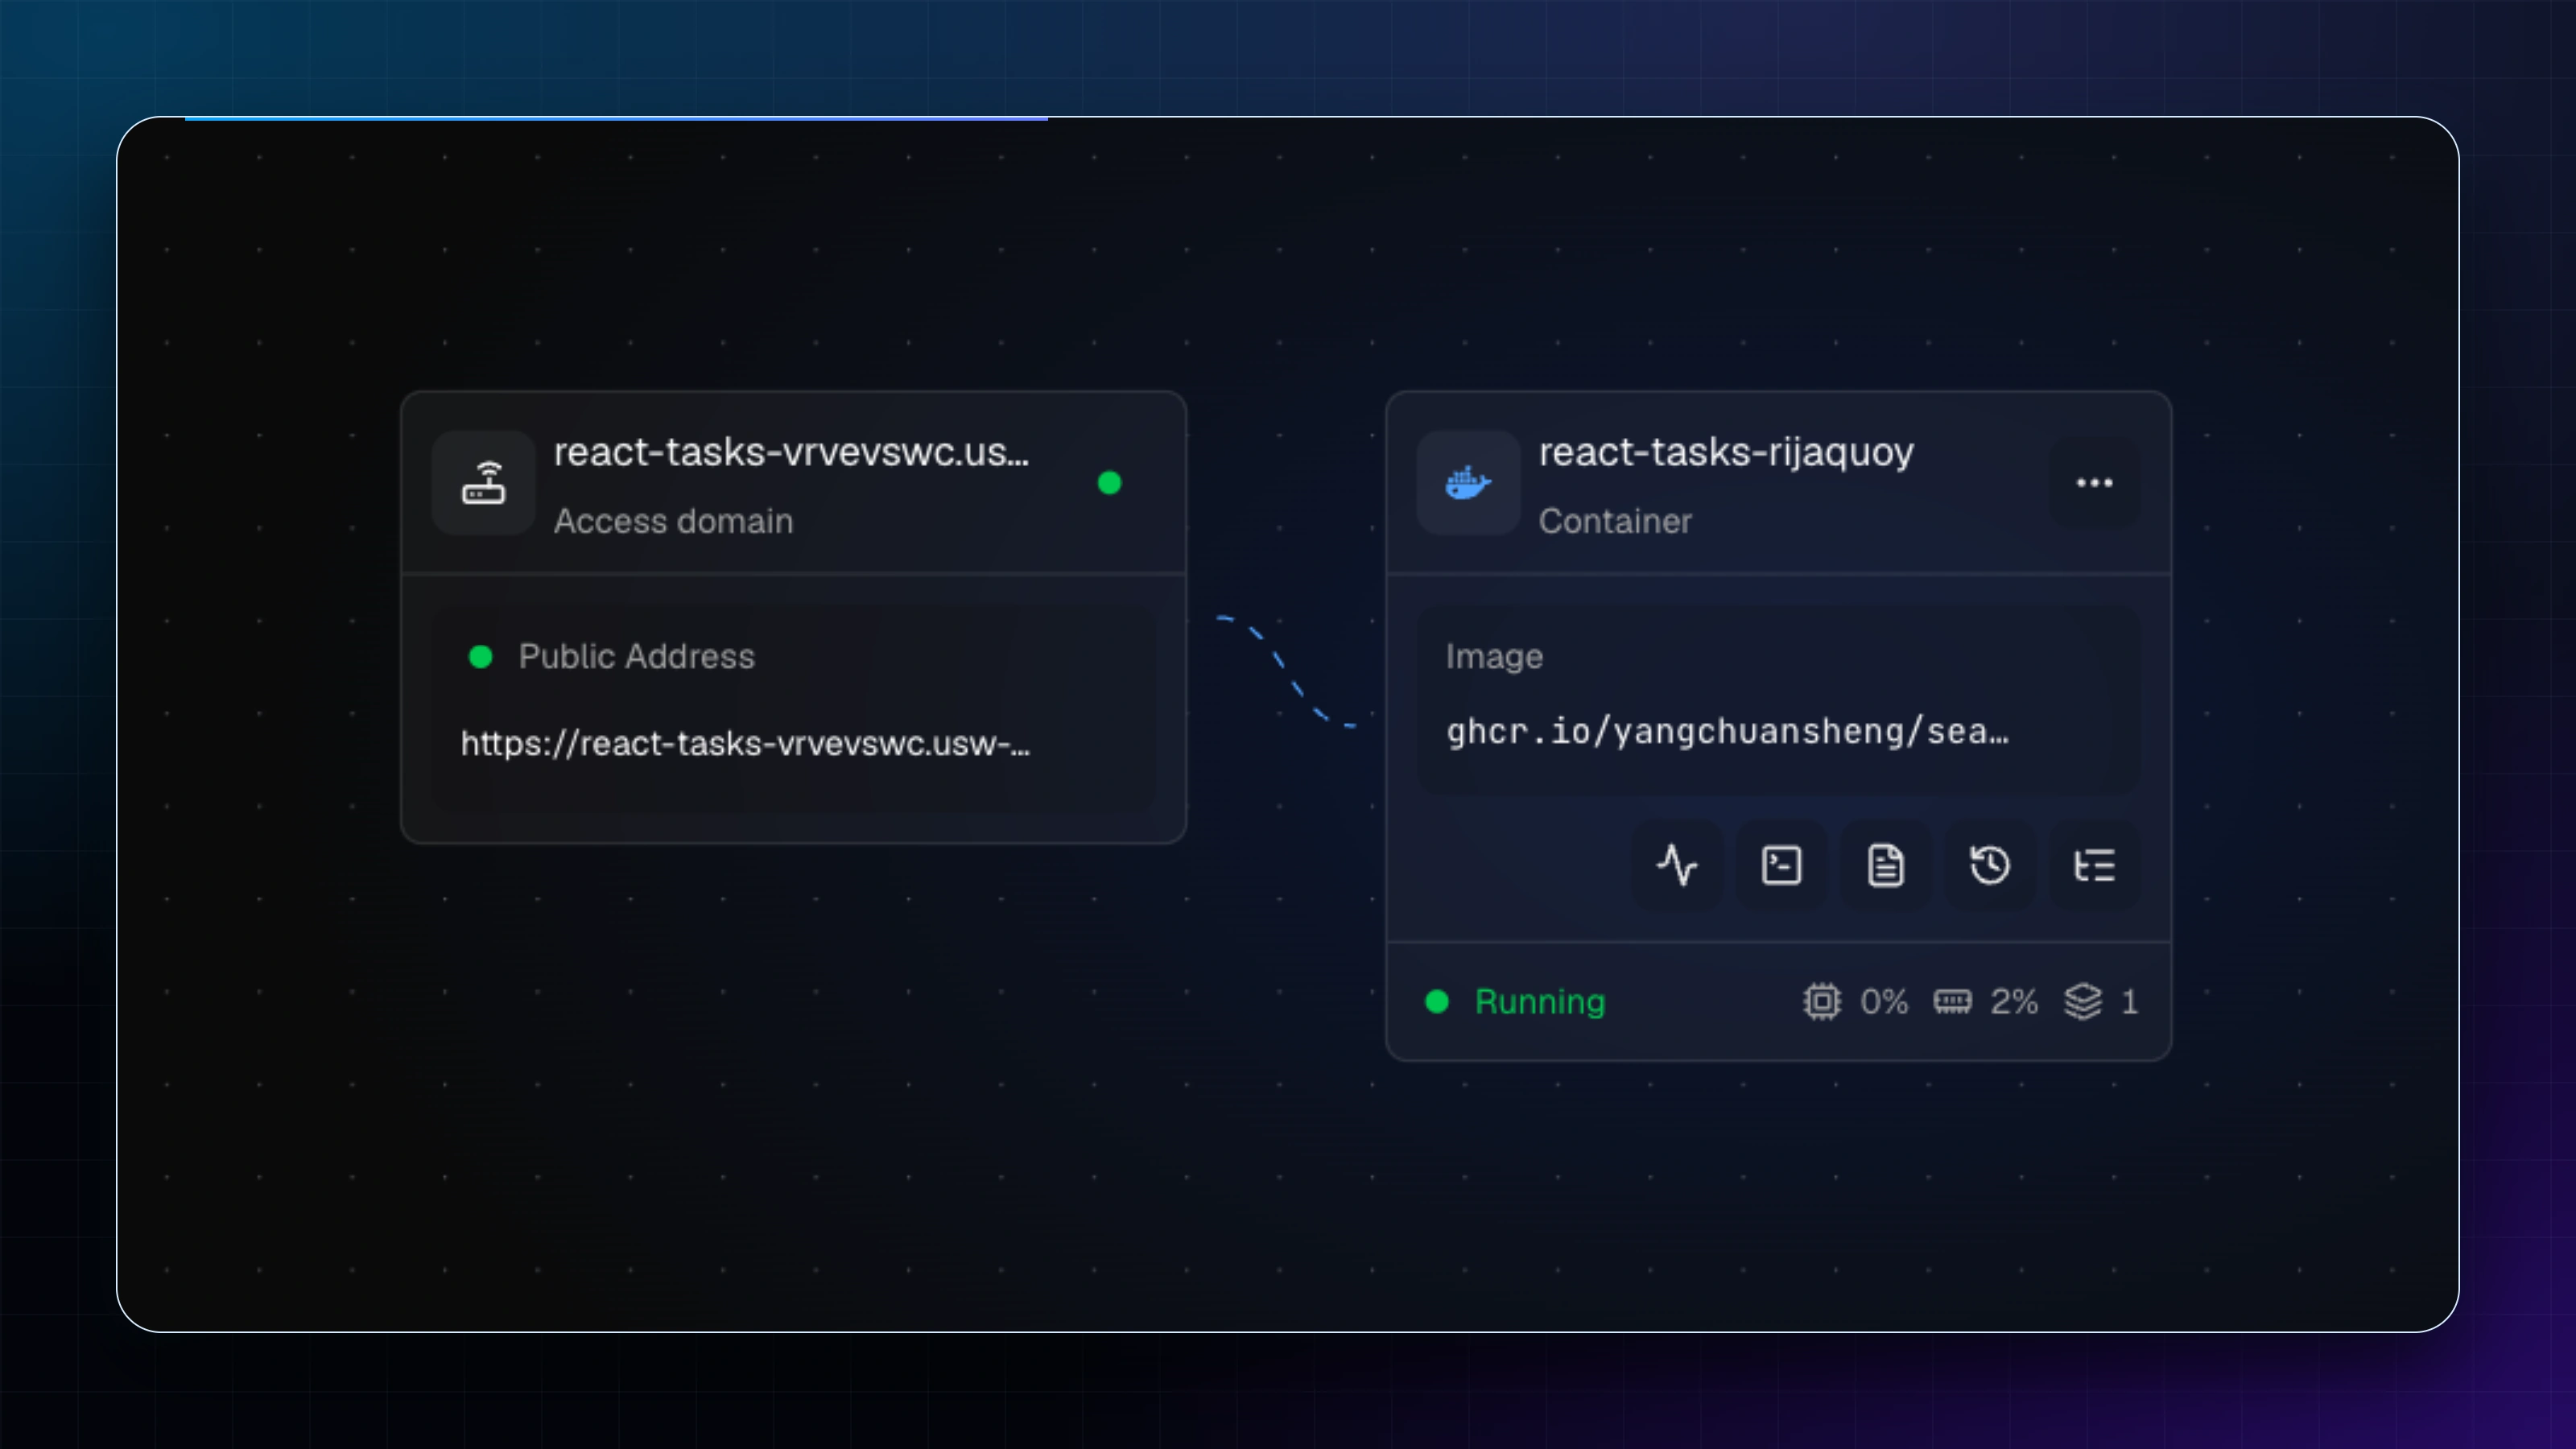 Sealos Project Canvas showing the React application running with healthy public access
Open the public page and its assets
Open the HTTPS URL returned by Sealos, then type /dashboard after its hostname
and open that address directly. Confirm that React tasks, Task list, and
the styled form appear.
If you see an Nginx
404 Not Foundpage at/dashboard: The served configuration needs the client-route fallback. Restoretry_files $uri $uri/ /index.html;innginx.conf, deploy the saved application through Sealos Skills, and open/dashboarddirectly again.
Open Network in your browser's developer tools and reload /dashboard.
Confirm the hashed JavaScript and CSS requests succeed. Open the CSS request's
URL in a new tab and confirm it contains the stylesheet rules.
Set the returned HTTPS origin in your terminal, replacing the sample hostname:
Expected: the first request prints the root element, and the second prints
404. The address should contain the protocol and hostname, with the trailing
slash omitted.
If you see
Failed to load module scriptwith atext/htmlresponse for an asset: The script request is receiving the page fallback. Restorebase: '/'invite.config.jsand the separate/assets/location withtry_files $uri =404;innginx.conf, then rebuild and deploy the saved application. Reload/dashboardand check the JavaScript and CSS responses again.
Create and read a Task
- On the live
/dashboardpage, enterRuntime proof from Sealosin Title. - Select Add task and confirm the Task appears under Task list.
- Refresh
/dashboardand confirm that the same Task remains visible.
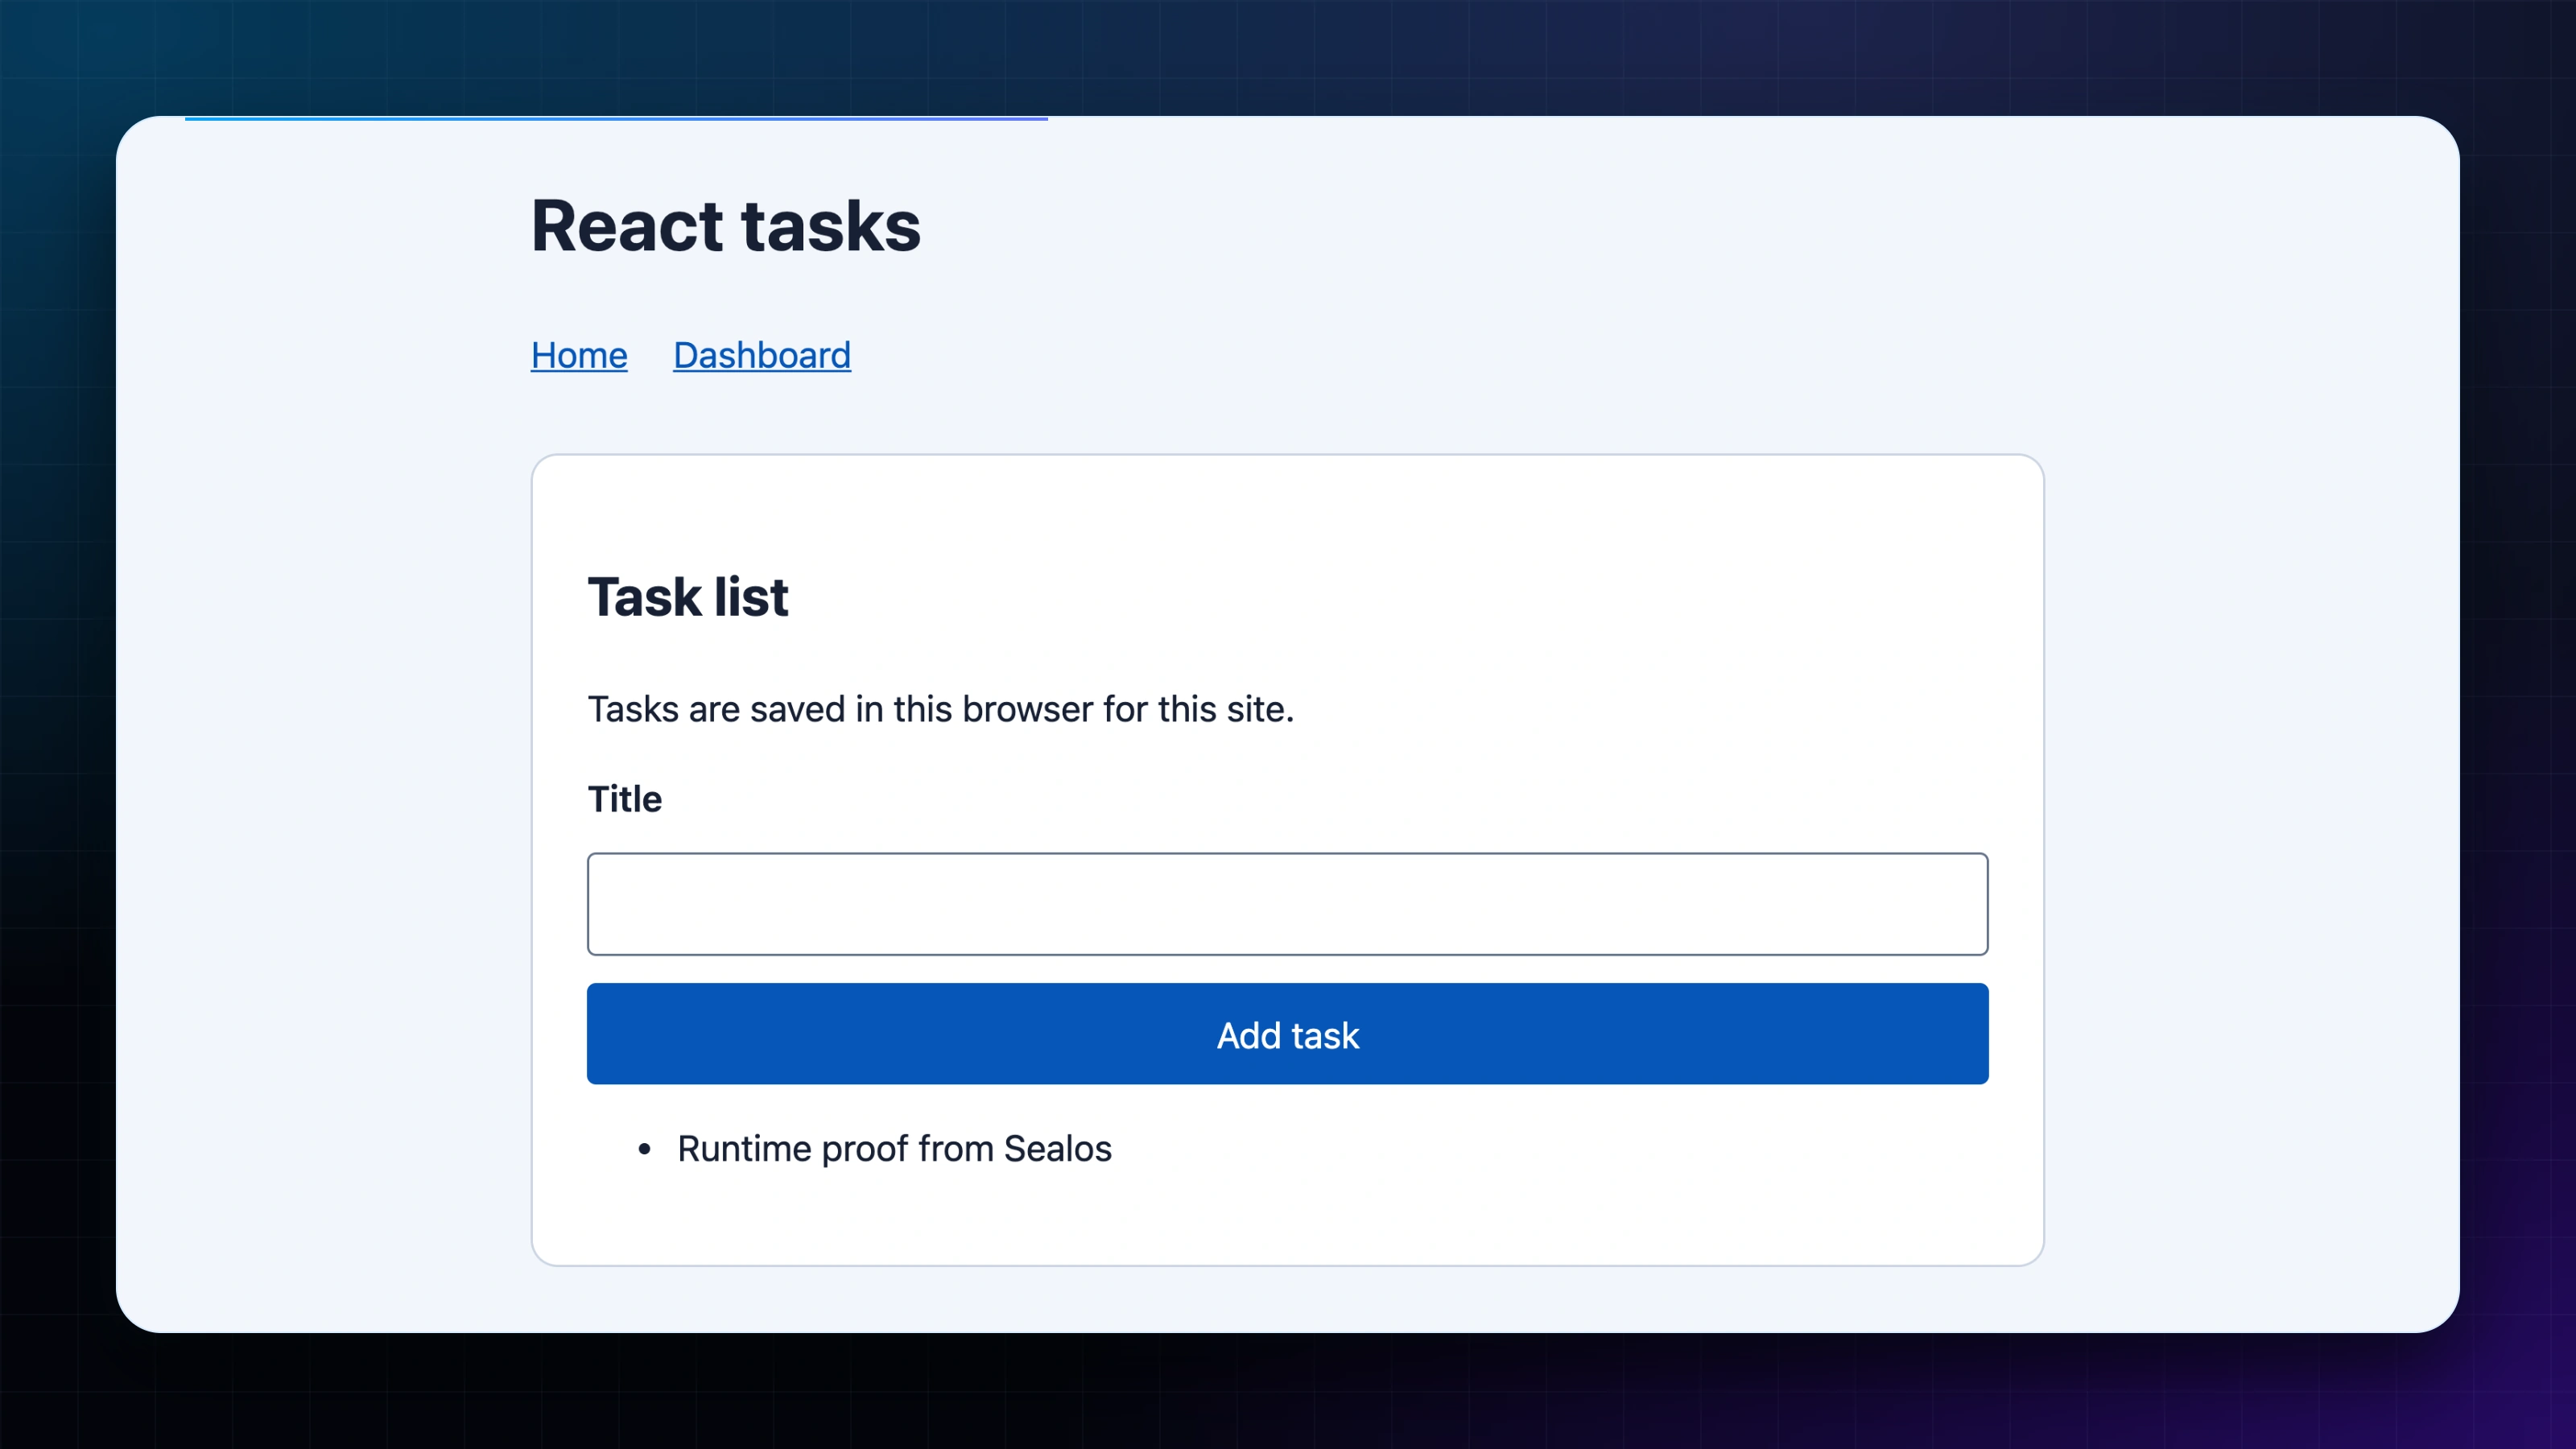 React Task app showing Runtime proof from Sealos after a browser refresh
Captured from the deployed app at its public HTTPS address.
You have exercised the deployed JavaScript, the form, and storage in this browser. Use this same browser profile and HTTPS origin for the update check.
Deploy your next change and continue
In src/App.jsx, replace the dashboard heading with:
From the repository root, check and commit the change:
Ask Sealos Skills to update the saved application:
Review the plan and confirm that it targets the saved application. After the
update, refresh the original /dashboard URL and check the new heading. Add
Verify the update, refresh again, and confirm that both Tasks remain visible.
Reload the Network panel and confirm that the updated JavaScript and CSS
load successfully.